Showing posts with label canning. Show all posts

Thursday, October 25, 2018

Remaking Jam That Didn't Gel


I've been preserving and canning food for a while now. I'm no expert but I've had pretty good luck so far with applesauce, chutney, jellies, and all kinds of jams.

Until now.

Yep, I just had a couple of large batches of jam fail spectacularly.

The Backstory

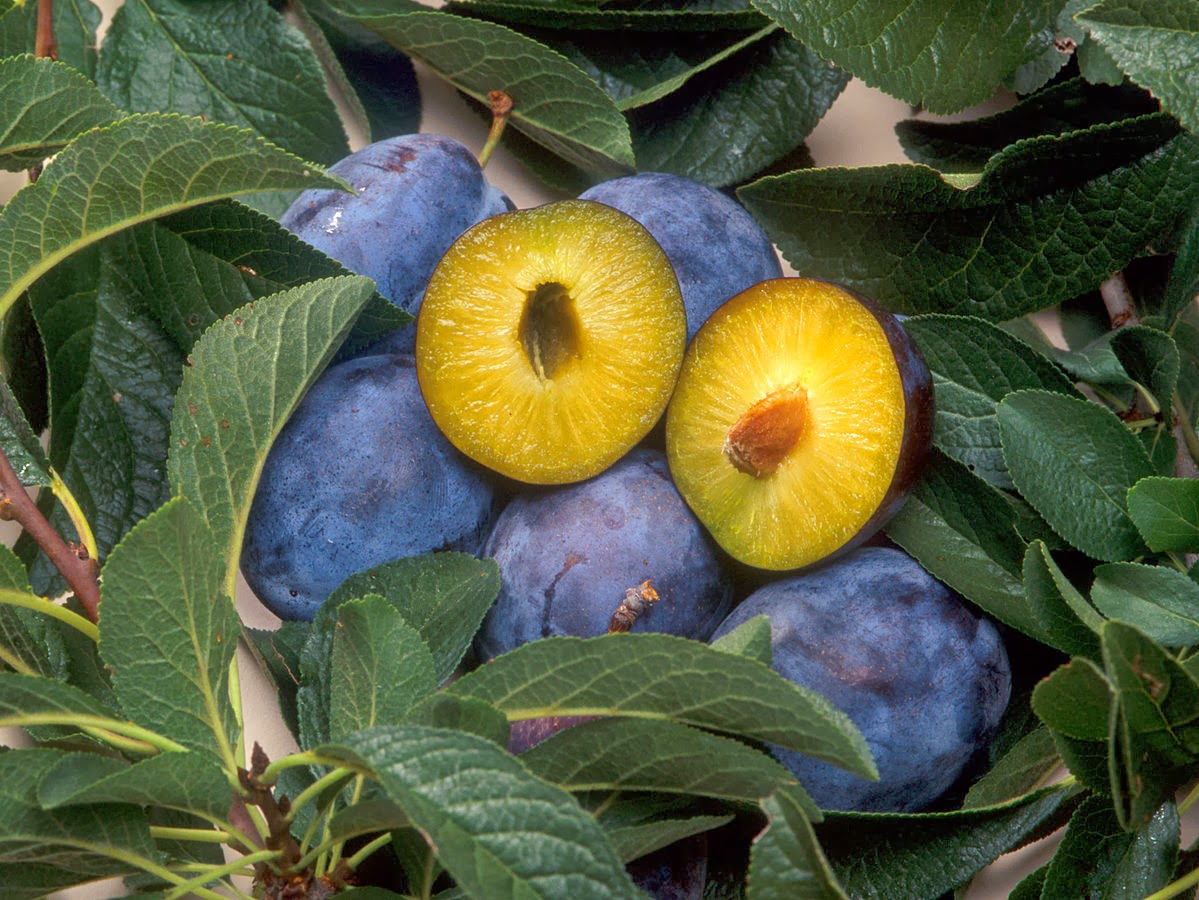
This summer we had a HUGE crop of plums in our yard from just two plum trees. Stupendously big crop. SO. MANY. PLUMS.

We gave plums away, we dried plums, we made plum chutney, we made plum sauce, we made plum pies. And still we had plums coming out our ears.

So we decided to try to make plum jam. This is not a jam I'd ever made before. A friend made me plum jam from a different type of plum a few years ago and I didn't like it at all. Thus, we'd never tried plum jam with our plums...but we were ready to try anything to get rid of all these plums!

So we made a few successful batches of plum jam, and I tried a little on toast one day. WOW. I was so surprised. I loved this plum jam. I think the difference was ours was made with Italian plums which makes a delicious, thick, extremely flavorful jam. I immediately knew I'd be making more.

We finished picking all the rest of the plums...we got like 3-4 big buckets more. So we decided to make several batches of jam, using up the last of the regular pectin (Sure-Jell) in my cupboard. The first batches went well, no problems. The last batch, though, was a full-sugar recipe (which I rarely use because I find it too sweet). But I was out of my preferred pectin, and I'm loathe to waste food. So we winced and made full-sugar plum jam. We thought we followed all the directions correctly, but in the end it never gelled.

So now I had a whole bunch of jars full of plum syrup. This is not something I am likely to use. I have some raspberry syrup from a batch of raspberry jelly that didn't set up a couple of years ago and we are still trying to use it up. Mostly we add it to lemonade to make Raspberry Lemonade, but it doesn't take much so it takes forever to use up. All those jars of Plum Syrup were never going to get used.

So I thought, let's see if we can remake that jam and get it to set up properly.  I'd never done this before so I did a little research and found some articles online.

Keep in mind, the information below is pertinent only to jams with an added pectin like Sure-Jell (either the pink box or the yellow box).

Cooked jam without any added pectin is another story entirely and not covered here; Food in Jars is a good website for that type of jam. Directions for remaking jams with Pomona Pectin can be found on the Pomona Pectin website.

General information about different types of pectins and the pros and cons of each can be found in my article on pectins. This article gets a lot of online traffic so hopefully people are finding it useful.

Why Gelling May Fail


When it comes right down to it, making jams and jellies is really a chemistry experiment. Certain reactions are needed in order to make gelling action happen. Basically you cook up mashed fruit, then add a certain amount of sugar, acid, and pectin in order to make those reactions happen. Get the balance right and you get lovely jam or jelly. Get the percentage wrong and you get a runny mess.

Fruits naturally have some pectin in their cell structures, especially in the skins and seeds. The goal of cooking the fruit is to break down the pectin in the individual fruit so it can then build a mesh with the pectin from other fruits. This makes a gel where fruit bits are suspended in a latticework of pectin.

The problem is that pectin molecules repel each other. Acidity is needed to overcome this and let pectin molecules bond with each other to make the lattice structure. Sugar is needed to bond with the water so the water doesn't overwhelm the pectin. So all of these, heat, sugar, acid, and pectin, are needed in just the right amounts and timing to make jam or jelly.

Here is a quote about the process from a science blog:
The whole chemistry of jam making is all about making this pectin that's in the fruit break down and become water soluble. That then recombines, and all of those hydrogen bonds that are holding it together recombine in a chemical reaction with the fruit acid and with the sugar, and that makes a lovely network that forms a gel, and that's the kind of jelly-like substance of jams. 
So you need to get that chemical reaction right, the pectin amount right, the fruit acid right, and the amount of sugar right so that you make the right consistency of that network that will hold your jelly together, your jam together, so you don't get fruit sauce.
Fruits that are naturally high in pectin and acidity like quince, underripe apples, red currants, cranberries, and gooseberries are an exception. They often don't need anything except cooking in a little water to set up and gel.

Here are a few reasons why an added-pectin jam of most other fruit may fail to set up/gel:
  • Not enough acidity - Some fruits have enough acidity on their own to gel without adding lemon juice, but most fruits need added acidity via lemon juice, lime juice, vinegar, or other acids. If you didn't add enough acid, the fruit won't gel
  • Not enough sugar - Box pectin jam recipes should not be altered. If you use less than the full amount of sugar, the jam will not set up. Therefore, follow the recipe on the box and measure exactly; don't try to make it "healthier" by using less sugar. The recipe depends on that exact amount of sugar. The exception is Pomona Pectin, which uses a type of pectin that doesn't need sugar to activate it; it uses calcium instead. If you want to reduce sugar in jams, use Pomona Pectin, but remember that most jams need at least some sweetener for the sake of taste 
  • Too much water added - Using too much water to cook the fruit can throw off the balance of pectin, acid, and fruit. Use only enough to keep the fruit from burning 
  • Doubling a batch or making too large a batch - Jam batches need to be made one at a time, no more than 4-6 cups of fruit at a time. You can't double a batch and expect it to set up properly. One of the annoying things in jamming is having to make and clean up each batch separately. But that's better than having to throw it all away!
  • You didn't get a hard enough boil - Added pectin needs a hard boil of about a minute in order to activate properly. If you didn't boil the pectin long enough, the gel may fail. If the pan boiling the fruit plus pectin was too deep, then the heating may be uneven, affecting the gel
  • Cooked too long - Some jams turn out runny because they were boiled too long. Overcooking can destroy the ability of the pectin to sustain its structure
  • Using over-ripe fruit - The riper the fruit, the less acid and pectin it contains, and the runnier the resulting jam. If you use very ripe fruit, either add more pectin and acid or add some under-ripe fruit to balance the batch. Another choice can be to add in fruit naturally rich in pectin and acid like the ones listed above if you don't mind the extra flavors in your jam 
  • Pectin too old - Some types of pectin lose their effectiveness if not used within the first year. Pomona Pectin does not have this issue but it's the only one that is reliably long-lasting
  • Leaving the jars in hot water too long - If you put the jars into the canning pot too soon, before the water has boiled, the total exposure to heat may become too much and break down the pectin structure. Likewise, if you leave the jars in the hot water too long afterwards, that can also break down the pectin. After the 10 minute canning time and the 5 minute rest time afterwards in the canning pot, take the jars out immediately and place on a towel on the counter
  • Tipping the jars - Some resources say that tipping the jars to the side as you take them out of the canning pot (or while they are cooling on the counter) can destroy the pectin bonds that are trying to form. Pick jars straight up out of the canner and leave them on the counter. Resist the temptation to tip them and check the set until at least 24 hours have passed 
  • Not waiting long enough - Some jams with some pectins don't set up for a long time, even a week or two. You can always just let them set on the counter and see if the gel improves
Bottom line, if your jam didn't set up, the most likely cause is that you were out of balance with your sugar/acid/pectin, or you didn't cook it for the right amount of time. However, there are a few other nitpicky mistakes that even experienced jammers can make. If you have a significant jam failure, review the list and see if any apply.

Remaking Syrupy Jam


Whatever caused your syrupy jam, don't throw it away. Even very experienced jammers have had batches fail, so they have certain techniques for fixing a failed gel. They don't always work but they are worth a try. The following is the most commonly recommended technique for remaking jam.

First, be sure you have everything you need ready to go ahead of time. This includes a canner full of hot water; funnels, jar-lifters, and ladles clean and ready to go; extra new lids for the jars; and enough extra sugar, pectin, and lemon juice to remake the jam.

Open the lids of the runny jam (these lids cannot be reused for canning). Pour the jam out into a glass measuring cup until it makes a total of 4 cups. Clean the old jars in soapy water and rinse, or use new clean, sterilized jars. 

Mix 1/4 cup sugar, 1/2 cup water, 2 tablespoons bottled lemon juice, and 4 teaspoons powdered pectin. Heat up until it has been brought to a rolling boil. 

Add the 4 cups of syrupy jam. Stir continuously until the whole thing has been brought to a rolling boil. Keep boiling for at least 30 seconds more, but don't overboil. 

Remove from heat, ladle into jars, put on NEW lids, add screwtops, then can in a waterbath canner for 10-15 minutes, depending on the size of the jars. Turn off heat and let jars sit in water for 5 more minutes, then immediately remove jars straight up out of the canner without tipping them. Put them on a towel on your counter overnight.  Don't check or tip them until 24 hours have passed. 

Some people report that chia seeds can be used to thicken up a runny jam, if you are open to that. Personally, I dislike chia seeds so I have never tried this but if you like them it may be worth a try.

Remain Philosophical About Results


Sometimes you can seemingly do everything right and a jam will simply not set up. Who knows what went wrong? All you can do is give it your best shot at redoing it. About half to two-thirds of the time, you can fix a runny jam. Sometimes you never do. Don't be afraid to just give up and call it Syrup at some point. Feel free to pretend that's what you wanted all along. Plenty of cooks before you have done the same!

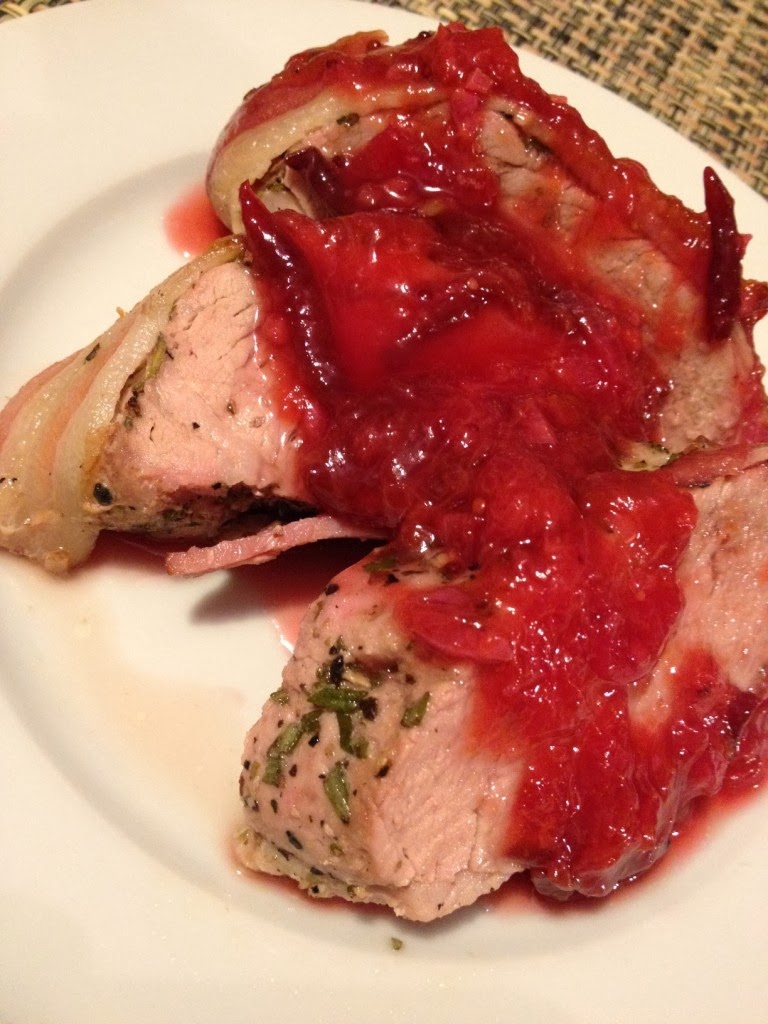
Don't throw away your results. People use syrupy jam as toppings for pancakes, waffles, ice cream, yogurt, or desserts like poke cake. Our family sometimes adds it to lemonade to make a special drink during the summer. It can also be dehydrated into fruit leather, like above. Or you can add a little corn starch and use it as a glaze for roasted meats. It's surprisingly tasty as a glaze with pork in particular. (If that sounds weird, think about cranberry sauce with turkey at Thanksgiving. Same principle of fruit with savory.)

My first try at remaking syrupy plum jam was a mixed success. Some of it came out perfectly; no problem with the set the second time around.

However, about half of it didn't set again. Oh well. Considering how many batches of plum jam we made, that still left me with a lot more Plum Syrup than I wanted. On the other hand, we saved half the batch. I consider that a win.

I'm not quite sure why some batches failed in the original jam. My guess is we got sloppy in our measuring because of how much fruit there was and used too much fruit at once. I also think the last batch of pectin was from an older box. Also, my daughter helped, so she may have cooked it too long; I'm not sure. But at least we were able to rescue about half of the runny batches and remake them properly.

The rest of the syrupy jam we just made into Plum Fruit Leather, using both the oven and a dehydrator. Same great flavor, and at least we didn't waste it!


Resources and References

Friday, June 27, 2014

Canning Books for Beginners

Image by Carter Housh

It's that time of year, when all the bounty of summer fruits are starting to roll in. Strawberries are in, rhubarb is in, the raspberries have just sprung to fruition, and cherries are hitting full force. Blueberries are just around the corner, and then it's time for plums. Yummm!

For me, that means it's time to start canning in order to preserve all these delicious fruits so I can enjoy them next winter too.

This is not something I grew up doing or learned from my mother; I had to learn it on my own. I came to it only in middle age, but it's a skill I'm determined to teach all my children because I think it's something everyone should know how to do.

If for no other reason, people should know how to preserve food so they have some emergency food on hand that doesn't depend on a refrigerator or freezer to keep it safe. And of course it's great to have these summer foods available to eat out of season, and they make great homemade gifts. But the best reason is because these foods just taste delicious!

So let's talk about the very easiest foods to can, jams and preserves, and the best books for learning how to prepare these.

Canning Books for Jams

When I was first learning how to can, I looked for a book that was quick and easy to understand, had great diagrams and instructions, and which had a lot of interesting recipes.

I found quite a number of good canning books and resources out there. Each one had something different to recommend it. Here are the best ones for beginners.

Put 'Em Up by Sherri Brooks Vinton is my favorite canning book and the one I recommend to beginners. I find the explanations very clear and concise, with some of the most clear illustrations of the process I've seen. When I was a beginner, this was the book that was most helpful to me.

I also liked that she organized the book by types of produce, so if cherries are in season and you are looking for something new to do with your overload of fresh cherries, you just turn to the "cherry" section of the book (which is clearly labeled and easy to find). That is really helpful. Many canning books are not organized like this.

The author has a great sequel too, just for fruits, with further recipes and hints on how to use them. And she now has a Preserving Answer Book, to answer common questions about canning, drying, freezing, etc. for those fairly new to food preservation.

One of the most common canning books, of course, is the Ball Blue Book Guide to Preserving and the Ball Complete Book of Home Preserving. Its companion website is www.freshpreserving.com, and it has a great guide to getting started with canning if you want to learn about canning without having to spend the money to buy a book.

This book is the classic canning book, and all its recipes have been extensively tested for safety. It's been around forever so it's got lots of time-tested recipes that have been favorites for generations. It goes far beyond the basic jam recipes included in most books and has recipes for many other types of foods besides jams.

A newer canning book that many people seem to like is Food In Jars by Marisa McClellan. The author has an excellent blog from which the book sprang. It has lots of interesting hints for canning and links to unusual products like special canning jars.

One interesting thing about Food In Jars recipes is that they often have unusual flavor combinations that go beyond the usual basic recipes found in most books. She typically does not use pectin in her recipes, but teaches the old-fashioned cook-em-till-they-set method. She has a great Canning 101 section on her blog where she answers a lot of questions about canning technique and safety.

The author has also written Preserving By The Pint, which specializes in canning recipes for very small batches, which can seem more do-able to the beginning canner since no special equipment and no huge pots of water are needed. You don't need to buy big batches of fruit and you end up with only a few jars to store, which is important if you have only limited storage. Most canning recipes were written for women with large families to feed; this is the scaled-down version for folks with very small families, not much time, or limited storage.

Another bonus is that the author does a lot of touring and offers classes all over the country teaching many of the recipes used in her book. That's good marketing and it helps a lot of people who feel insecure with canning to get past the fear and start doing it.

Another book which might be really handy for some is Preserving with Pomona's Pectin by Allison Carroll Duffy. This book specializes in recipes using Pomona's Pectin, which is a somewhat harder-to-find pectin but which offers the distinct advantage of being able to adjust the sugar content in a recipe.

With most other pectins, you have very little flexibility about how much sugar to use in a recipe. The full-sugar pectins use insane amounts of sugar in their recipes; usually far more sugar than fruit. Even the "reduced sugar" pectins (like Sure-Jell in the pink box) still use quite a bit of sugar.

But Pomona's Pectin works differently than other pectins. It doesn't need sugar to help "gel" the jam; it uses calcium water instead to get the gel. This means that the sugar content of these jams can be adjusted to your heart's content. You can use as much or as little as you prefer, and you can use honey, agave syrup, fruit juice, or artificial sweeteners to sweeten your jam instead of sugar. If you are one of the many people trying to reduce the sugar content in your diet for health reasons, this is a great option to have.

Pomona's Pectin offers a lot more flexibility than other pectins, but it has a little steeper learning curve than the full-sugar pectins. Having a book that discusses the process of using this pectin in minute detail can be useful for those new to canning with Pomona's Pectin.

Summary

There are many, many great canning books available out there, but these are some of the best canning books for beginners. Youtube also has many video tutorials available on canning, and you can find many canning instructional DVDs as well.

Once you get good at the basics, then you can start adding wet and dry "zing" (spices and liqueurs) to your fruit ingredients and creating your own custom recipes. Or you can learn how to make pectin-free jams. But first, it's helpful to get comfortable with the fundamentals.

There are so many great resources on learning to can out there; get started on learning this important skill this summer! Or take your basic knowledge of canning to a whole new level of experimentation instead by playing around with the more advanced recipes in these books and blogs.

Remember, it's perfectly okay not to be a Canning Diva; you're not a canning failure if you don't spend all your time in the kitchen or put up great quantities of food. Do as much or as little canning as you have time for, but do learn to can so we keep this important skill alive and so that you have shelf-stable food put aside for emergencies. 

Tuesday, February 18, 2014

Singing the Praises of Dehydrating Frozen Veggies

Last year, I got a food dehydrator as an experiment to see if it was useful in preserving our garden harvest.

Although I'm still pretty new at this dehydrating thing, I'm really liking it so far.

I wanted to see if using dried veggies and fruits are as tasty and useful as people say. Are they really a good addition to your food storage efforts and everyday cooking, or are they redundant to frozen foods?

Because we weren't sure about how much we'd actually use a dehydrator, we didn't buy the expensive Excalibur brand that many folks recommend, just the cheaper round type you can get nearly anywhere.

We've been slowly putting our new dehydrator to the test. And I have to say I'm a fan! We've dehydrated sliced apples (HUGE hit with the kids) and a number of different kinds of vegetables. We'll try to do more of other types of fruits and veggies next year.

But what I'm really excited about is how easy dehydrating frozen veggies is.

Using Frozen Cuts Down on Prep Work

As I have developed my gardening skills, I find that we have more food than we will typically eat right away. So last year I worked at cutting, blanching and freezing my extra veggies so that when I needed some, I could just open the freezer and get them. And it was handy to have them already prepped in the freezer, I have to say.

However, I have to be honest...I am extremely lazy. I can't stand doing lots of prep work if I don't have to. So while I enjoyed having a bunch of chopped carrots from my garden in the freezer, I wasn't too enthralled with the long process of washing, peeling, chopping, blanching, and then freezing them individually on cookie sheets, then getting the whole mess into a storage container. Why not just buy frozen? Not organic but waaaay less work.

Dehydrating would involve a similar process; wash, peel, chop, blanch, and then put them in the dehydrator. This kind of prep isn't hard, just time-consuming and repetitive. With four kids, teaching, and writing, I prefer to do other things with what free time I have instead of standing around in a kitchen doing prep work.

So while I LOVE having fresh veggies from our garden all through the year, I had to be honest with myself that I wasn't likely to spend a ton of time doing all this prep because I find it so boring and repetitive. Some people enjoy that kind of cooking and fussing; I really REALLY don't. Yet I didn't want to give up on adding more vegetables to our diet. So I looked around to see if there were any shortcuts we could take.

What I found was that it's way easier to dehydrate frozen veggies from the store.

Get some bags of frozen veggies on sale, toss them on the dehydrator trays, and plug in the dehydrator. Simple as that. About 8-12 hours later, you have dehydrated veggies!

What's the advantage of dehydrating frozen vegetables? Frozen veggies in bags have already been made into uniform sizes, blanched, and individually frozen.

All that prep work, already done for me?  SOLD!

Yeah, it's not my home-grown veggies, which are tastier, and yeah, it's not organic (which I strongly prefer), but the convenience factor can't be beat. So I'll probably continue some of both....freezing, canning, and drying my garden surplus, plus dehydrating frozen bags of veggies.

My next goal is to make homemade fruit leather by drying my homemade Spicy Ginger Applesauce in the dehydrator. I might even try dehydrating some of my special Oven-Roasted Spaghetti Sauce to make a quick and easy addition for things like soups or chili.

Why Dehydrate?

I'm sure some people are wondering, though...why go to the trouble of dehydrating? Why not just keep bags of frozen veggies and use them? You can certainly do that if you want, but the advantages of dehydrated foods include:
  1. You always have food on hand, even when you are too busy to get to the grocery store or when circumstances like illness prevent getting fresh food from the market or garden
  2. Dehydrated veggies are lighter and smaller to store. You can store much more food in the same amount of space, which is far more efficient storage
  3. You don't need electricity to store dehydrated food. If power goes out, you won't lose as much food storage if some of it is dehydrated. You'll lose refrigerator and freezer stuff eventually, but the dehydrated stuff will still be good as long as you store it properly
  4. You can save money by buying big amounts of food when it's on sale and then dehydrating it
  5. Dehydrated veggies will save a bunch of prep time during cooking on busy days. Just put dehydrated veggies into hot water in a pot or a slow-cooker and start a good soup or stew
  6. In an emergency, you will have easy-to-fix food that is either ready-to-eat (dehydrated fruit, fruit leathers, beef jerky) or quick-to-fix (dehydrated veggies in soups)
  7. Dehydrated foods are handy and lightweight for backpacking or other forays into nature
Remember, you don't have to make a choice between types of food preservation; combine them so that you have several different types of food storage available. You can still use the freezer for the stuff that really needs to be frozen, and you can still do canning of foods that you prefer canned. Dehydration just gives you more choices in your storage. The more diverse your storage is, the more resilient it is.

In winter, when we are so busy with school activities and rushing about, having dehydrated food already prepped and ready to just throw in a soup stock to rehydrate will save a bunch of time when cooking. I really like that. Convenience food without the junk food health penalty....definitely a bonus.

For example, when I cook chili, I usually add shredded or diced carrots, corn, onions, etc., and sometimes zucchini or other veggies. Before, I had to take the time to chop up the veggies while I was cooking the meat. Not that hard, but sometimes we were too pressed for time and so I didn't add as many as I would have liked. Having already-chopped dehydrated veggies takes away a lot of that prep time and makes my life easier.

Same thing for cooking in the crock pot. It can be a hassle to chop and prep everything in the morning before leaving for work, and it's not easy to fit it all in as you get the kids ready for school. Having dehydrated veggies you can just throw in along with the fresh ingredients would shorten the process considerably, making me more likely to do crock pot cooking more often.

So it seems to me like dehydrating frozen veggies is even more of a WIN-WIN situation. Gives us more emergency food storage, frees up freezer space, keeps me from having to do all the blanching and chopping myself, saves on prep time during cooking, and encourages more use of veggies. What's not to like?

If money is an issue, it's perfectly fine to get one of the cheap round dehydrators (which can be found even more cheaply on eBay and at garage sales). Start small, see if you like it, and then if you really get into it and want to do a ton of dehydrating, consider upgrading to the Cadillac version, the Excalibur. For most of us, the small round dehydrators are perfectly adequate and store more easily.

To find out more about dehydrating, click here, here, or here, or google it for even more links. There's plenty of information, videos, and helpful hints out there on the internet if you are interested.

Do you dehydrate?  What foods do you dehydrate?  Any hints for dehydrating newbies?


Thursday, January 23, 2014

Spicy Plum Chutney

Image from Wikimedia Commons
When I first started developing an interest in canning, I was looking for a way to preserve some of the fruit off the trees in my yard, especially my rather prolific plum trees.

While eating plums fresh are okay, they are not my favorite fresh fruit, so I was looking for ways to use them in other recipes.

Hands down, my favorite thing to do with the plums in my yard is to make plum chutney. So so so SOOO good! And by canning it, I get to enjoy it all year round.

What is chutney, you ask?

Well, chutney means different things to different people, but basically it's a condiment of spices and fruits (and/or vegetables) that is usually both savory and sweet at the same time. It's a fruit or vegetable relish that is served with a main dish to complement its flavors.

Most chutneys you get in Western countries have Indian roots but have been Europeanized, so they're not truly "authentic." Still, these chutneys have plenty of charms. They usually involve cooking fruit, vinegar, onion, garlic, and spices together, then concentrating the flavors by cooking things down in a reduction.

Now, that may not sound that great if you are new to it (fruit, onions and vinegar cooked together?), but it really is quite good. A little sweet, a little sour, a little savory, a little spicy ─ all in one. Goes great with meats and cheeses.

The best-known fruit chutney is probably Major Grey's Chutney, which uses mangoes, onions, vinegar, raisins, lime juice, and spices. (If you've never tried it, you definitely should!)

Image from sirenabernal.com 
There are many other types of fruit chutneys out there, but my personal favorite is plum chutney.

The best way to eat plum chutney, in my opinion, is on pork tenderloin, which is a good lean cut of pork. There's a good recipe here.

Basically, roast the tenderloin, let it "rest" for a few minutes after taking it out of the oven, then slice it up and serve with the plum chutney on top.

You can put some chutneys on meat before roasting it, but my family agrees that this chutney is much tastier when it is added after the meat is cooked.

The recipe above has you make the chutney fresh, at the same time you are roasting the meat. However, it's also useful to make the chutney ahead of time and then can it. Then it is available whenever you want it, whether or not plums are in season. It shortens your prep work to have it already made and shelf-stable, and the flavors intensify if they are on the shelf for a while.

This is the recipe I use, which is taken from Put 'Em Up by Sherri Brooks Vinton. It's a little on the runny side and it's not as pretty-looking as I might like, but the flavor really can't be beat.

Plum Chutney

2 c. cider vinegar
2 c. sugar
4 pounds plums, pitted and diced
2 large sweet onions, diced
1/2 c. diced prunes
2 T. freshly grated ginger
2 T. mustard seed
2 t. salt
zest of one lemon, cut into thin strips
2 garlic cloves, minced
1/2 t. ground cloves

Bring the vinegar and sugar to a boil in a large non-reactive pot. Add the plums, onions, prunes, ginger, mustard seed, salt, lemon zest, garlic and cloves and return to a boil. Simmer until thickened, about 30 minutes.

Can with the boiling-water method for 20 minutes (adjusting for altitude if needed). (Canning directions for beginners can be found here.)

Enjoy!


Wednesday, January 15, 2014

Spicy Ginger Applesauce

I'm busy catching up on a few projects, so another fluffy post today.

Haven't posted much on gardening or canning this year, so thought I'd share one of my favorite canning recipes - Spicy Ginger Applesauce. Mmmmmm, this is GOOD stuff.

I make many quarts of this every fall when our apple trees bear fruit. Our neighbors also give us the apples from their trees, and we invest in apples from local orchards as well. As our apple trees become more mature, we won't need the local orchards as much, but we'll probably always get some so we have a wider variety of apples for the sauce.

We give homemade gifts to our friends and the kids' teachers. Some years it's plum chutney, this year it was Raspberry Jelly or Spicy Whiskey Pumpkin Butter, but every year is a Spicy Applesauce year. Yep, it's so good that people request it for gifts!

I both can and freeze the applesauce since I like to have both types of storage on hand. I often also dehydrate some apples and make apple chips as well. Sadly, these don't last long if my sons find them (note to self ─ make more next year)! I haven't made fruit leather from the applesauce yet but I hope to next year. Should be goooooood!

The recipe is extremely easy. You can make it on the stovetop in the traditional way, or in a crockpot if you are in and out all day or want to do it overnight. It's very flexible and adaptable. The hardest part is getting the apples ready, and that's not very hard. I do it while watching T.V. or doing laundry so I can multi-task.

You adjust the sweetness and spiciness of the sauce to your family's taste. Some people like their applesauce very plain and apple-y; our family prefers it with lots of cinnamon and spices. A recent experimental addition in our house has been ginger, which really gives the applesauce some zing. Our Spicy Ginger Applesauce has gotten rave reviews from all who have received it so far.

The key to not needing very much sugar is to cook the apples in apple cider (or apple juice, but cider gives a richer flavor) instead of water, and to add a bit of salt to the sauce while cooking it down. The salt really potentiates the natural sweetness so you don't need as much sugar. In addition, a touch of vanilla enhances the flavors and makes the sauce seem sweeter than it is.

Some people prefer their applesauce with no added sugar. I like the flavor better with at least a little bit of sugar, but you need less than you might think, especially if you add it at the end of the process instead of early on. Personally, I think white sugar gives the best results without distracting from the apple flavor, but many people make it with brown sugar, agave syrup, or honey instead. Whatever floats your boat.


Mixing several different apple varieties together in the sauce is another key to improving the flavor and sweetness. I like a mix of Braeburns, Galas, Fujis, Gravensteins, or Winesaps, but I usually limit myself to 2-3 apple varieties per batch. That way they enhance each other without the flavors fighting each other for dominance.

Different people have different techniques for prepping their apples. Some just cut them up, boil 'em down, then use a strainer to mash them and take out the cores and peels. Others cut out the cores etc. ahead of time so they don't have that extra step of straining later on. Some bake them in the oven for even less prep, and then sauce them.

Lots of people use an apple peeler, like the one on the left, especially for homegrown organic apples with imperfect skin. The bonus of the apple peeler and slicer is that you can prepare extra apples for the dehydrator at the same time you are getting ready to make sauce. Using a slicer/peeler is a little messy but if you have fairly uniform-sized apples it works pretty well.

If I'm going for a really pretty sauce for gifts or special baking projects, I take off the skins and am very thorough about coring them so we don't find bits in the finished product. But in most of my sauces, I leave the skins on for extra nutrition (they disintegrate with the stick blender) and I don't care if I find an occasional bit of apple core or skin in the sauce.

Here's how I make my Spicy Ginger Applesauce. Feel free to alter it as you'd like when you make yours. I don't give any amounts; this is truly a recipe you adapt as needed for your own preferences. Just wing it; you'll be fine as long as you don't let anything scorch. And in time, you'll find your own preferred way to make the sauce.

  1. Prepare your apples - Wash them well and cut out any bad spots. Peel them if you prefer. Cut up the apples and put them in a little bit of salt water or lemon water to keep them from browning before the cooking begins. Drain them before starting to cook them.
  2. Cook your apples - Cover the bottom of a large pan with apple cider or apple juice. Add some lemon juice for acidity if you are going to be canning the applesauce. Add the apples. Cook the apples on medium heat (with the lid on to capture the steam) until the apples start to fall apart, about 30-45 minutes or so. If you like a very "appley" taste, start saucing here. Otherwise, it's spicing time!
  3. Cook the apples down - To intensify the flavor and get a richer, thicker applesauce, add a little salt, then reduce the heat to low and keep cooking the apples down till the liquid has reduced considerably. I let my apples cook down for at least an hour on the stovetop, or for several hours in a crockpot. This is the key for a really flavorful applesauce.
  4. Sauce the apples - Use a potato masher to smush the apples if you like a chunky applesauce; use an immersion stick blender if you prefer a very smooth, creamy applesauce. Watch out; the apples will be hot! Wear long sleeves and an apron to protect yourself from any splatter.
  5. Add the spices - Add a bit more salt and some vanilla extract (the good stuff), and stir it all in. Then add cinnamon, cloves, nutmeg and allspice to taste. If you like ginger, add either finely grated fresh ginger or a small amount of powdered ginger. (Ginger and cloves get more powerful with time, so go easy ─ a little goes a looooong way!) Stir the spices into the sauce and let it cook down even more. Keep a lid on to minimize any splatter.
  6. Sweeten the sauce - Add sugar or sweetener only at the very end of the process, and taste the sauce before adding to estimate how much you will need. Some recipes call for several cups of sugar, but I only add about 1/2 c. or so of white sugar to a pretty big pot of sauce. Some people add just a touch of honey, but I find the honey can overwhelm the apple taste. Brown sugar adds a bit of caramel taste, which can be tasty. Cook the sauce a bit longer, then taste and adjust as needed.
  7. Pour the sauce into heated jars - Using a measuring cup, ladle or funnel, pour the hot sauce into pre-heated, sterilized jars, leaving a bit of extra room on top. If canning, follow standard canning directions and immediately do a waterbath can for about 20 minutes (adjusting for altitude and jar size as needed). Let sit in the hot water for 5-10 minutes more to minimize air pockets and oxidation, then remove and cool on a towel. If freezing the sauce, let the jars cool on a towel for a few hours, then refrigerate overnight. Put into your freezer the next day. Label your jars with the date the applesauce was made.
image from oldworldfarms.com 
Our Spicy Applesauce is the best I've ever had, bar none, and I really do love the ginger version too. It's so wonderful to have on hand all through the year. It makes my mouth water just thinking about it!

This is definitely a very rich, flavorful applesauce, so if you like your sauce watery and appley like store apple sauces, you might not care for it. But if you are open to an applesauce that it has a little deeper, smokier, and spicier flavor, this is your baby.

And the nice thing is, it doesn't use much sugar. That's not for dieting considerations, but just to minimize sugar intake to stay healthy. To get such a rich flavor experience with so little added sugar is definitely a win-win situation!

The key is using several different apple varieties, cooking the apples in cider, adding salt and vanilla, and cooking the apples down thoroughly. This potentiates the natural sweetness of the apples and brings out their richer, deeper flavors.

Enjoy! 

Monday, September 3, 2012

Canning: Pecking About Pectins

Different brands of pectin; image from pickyourown.org 

We've been talking about canning and preserving as an end-of-summer change of pace for the blog.  Today, let's talk about pectins.

Previously, we talked a little about things that keep people from trying canning, which are usually safety fears or just pure lack of knowledge about how to can.

We reminded everyone that high-acid fruit jams, processed in a boiling water bath, are a very safe form of canning, unlikely to harm anyone because spoilage would be obvious (mold or a fermented smell). Thus, jams are a great place for beginners to start.

We also shared some resources for learning how to can, good books and websites for canning, online tutorials, and how to find canning classes in your local area.

One question that often arises in canning is the difference between the different types of pectin, and that can definitely be confusing.  So let's try to break it down a little bit now.

What is Pectin?

Pectin is plant fiber that is used as a thickening agent for jams and jellies.  Here is one website's summary:
By definition, pectin is a structural heteropolysaccharide found in the walls of plants that forms a colloidal system when combined with water. In simpler terms, pectin is a soluble fiber that forms a gel when you add water to it. Some plants have more pectin in them, some less. Apples and citrus fruits have the highest concentrations of pectin in them and are oftentimes the sources for what you will find on the shelves at your grocery store.
Knowledge of the uses of pectin has been around for a long time, as discussed here:
Jams and Jellies have been produced for many years, at least since the 18th Century. Recipes were published in the "London Housewife's Family Companion" of 1750 which described jellies made from apple, currant, and quince, all fruits rich in gelling pectin. 
Pectin was first isolated in the 1820s, and shown to be the key to making jams and jellies.
Gradually, people mixed pectin rich fruits or fruit extracts with fruits which do not set jams well - strawberry with gooseberry or with red currant, for example. Extracts of apple peels and cores were also used for "difficult to set" jams. 
Commercial jam producers sought further supplies of pectin source materials. In Germany, apple juice producers started to dry the pomace residue left after pressing juice for sale to jam makers, who would cook the pomace in water with or without fruit juice to make a jellying juice. 
The first commercial production of a liquid pectin extract was recorded in 1908 in Germany, and the process spread rapidly to the United States, where a classic patent was obtained by Douglas (US Pat. 1.082,682, 1913). This was followed by a rapid growth of the pectin industry in the United States, and also somewhat later in Europe. 
In recent years, the centre of production has moved to Europe and to citrus-producing countries like Mexico and Brazil.
There are several different types of pectin and each works a little differently. The main two types of pectin are high methoxyl pectin and low methoxyl pectin:
The high methoxyl pectin needs acid and sugar for it to work and is most commonly used for traditional fruit preserves. Low methoxyl pectin needs calcium present for the gelling process to work, which makes it better for low or no sugar preserves.
This is a crucial difference, so let's discuss it a bit more.

High Methoxyl Pectins

High methoxyl pectins are the kind most people probably think of when they think of canning.

High methoxyl pectins are easily found in most supermarkets. Common brands are Sure-Jell, Ball, Certo, MCP, and many others.

Different brands have differing processing requirements.  If you are going to make a recipe from the box, follow the recipes in that brand's box only. Don't swap brands because recipes are formulated specifically for that brand and its unique requirements.

Dry and liquid forms of high methoxyl pectins are not interchangeable either.  Each has their own advantages, and which you use is mostly personal preference. Certo is the most common liquid pectin you'll find, but Ball also makes a liquid pectin which some people prefer.

There are also rapid-set and slow-set high methoxyl pectins. The difference is in the Degree of Esterification (DE). The rapid-set ones have a high DE and are used for products where you want chunks of fruit suspended in a gel, as in marmalades. Slower-set ones have a slightly lower DE and are good for clear jellies.  

One disadvantage to high methoxyl pectins is that they need sugar to set up (jell), and therefore you can't alter the amount of sugar that's in the recipe.  The recipe has been tested to see just how much sugar is needed to make the jam set up properly, so if you lower the sugar amount you will get runny jam.

Another nit-picky detail about high methoxyl pectins is that they are very finicky about changes to a recipe.  If you try to make a double batch of jam, they won't set up well.  Definitely make two separate batches rather than double a recipe.  Also don't tweak the ingredients very much; a little bit of change in spices can be tolerated, but anything more will probably also affect the ability of the pectin to set up.

High methoxyl pectins need inordinate amounts of sugar.  Usually the sugar concentration required is above 55 percent, meaning that there is more sugar than fruit in the recipe, causing the jam to be super-sweet.  Many people (including me) don't like this.

No, I'm not trying to lose weight, and no, I'm not diabetic, but this is too much for me.  My sweet tooth is absolutely overwhelmed by the sweetness in some of these full-sugar recipes, and I don't think that much sugar is good for your body.

If you are like me and want to lower the amount of sugar in your jams, consider a low methoxyl pectin instead.

Low Methoxyl Pectins

Low methoxyl pectins are less commonly used and harder to find. However, they offer far more flexibility in the amount of sugar that's required, which is increasing their popularity quickly.

Low methoxyl pectin is made by subjecting high methoxyl pectins to a de-estrification process. High methoxyl pectins have a DE of more than 50%, and low methoxyl pectins have a DE of less than 50%.

A low DE means that low methoxyl pectins are responsive to calcium ions, unlike high methoxyl pectins, which lets them jell food differently.  Canning with low methoxyl pectin involves adding calcium in order to activate the jelling properties of this pectin.

This is the biggest difference between the two pectins.  High methoxyl pectins jell due to the interaction between the pectin, sugar, and acid, while low methoxyl pectins jell due to interaction with added calcium, thus requiring much less sugar.

Sure-Jell makes a low methoxyl pectin (available in the PINK box) in addition to its high methoxyl pectin (available in the YELLOW box).  In the Sure-Jell pink box, the calcium has already been added to the pectin powder and stabilized with dextrose, so the cook doesn't have an extra step in the canning process.

Many people like the low-sugar Sure-Jell because that extra step is done for them. However, Sure-Jell's "low sugar" recipes still use quite a bit of sugar ─ about 3 cups of sugar for every 4 cups of fruit.  Many people would like to use even less. So they turn to Pomona Pectin instead.

Pomona Pectin is the brand of low methoxyl pectin that will best accommodate low sugar recipes.  This type is "amidated" through an additional processing step, which lowers the degree of esterification even more. Because of this, it is even more responsive to calcium for jelling, rendering the amount of sugar irrelevant except for taste.

Thus, cooks using Pomona Pectin can use as much or as little sugar (including no sugar at all) as they prefer.  Most jammers end up using somewhere around 1/2 - 1 cup of sugar for every 4 cups of fruit with this pectin, but you can vary the amount of sugar used according to your taste, which is a flexibility no other pectin has.

In addition, since the jelling properties are not dependent on sugar, you can also use different types of sweeteners, like honey, maple syrup, fructose, agave, fruit juice, etc. Or you can use artificial sweeteners like Stevia if you need to watch your carb intake super carefully.  For diabetics, people with PCOS, or people with cane sugar allergies, this flexibility is huge.

However, the trade-off is that the calcium needed is not pre-added to Pomona, so you have to make a calcium-water mixture beforehand and then add it near the end of jamming. This calcium water thing seems strange if you've not used it before, but it's really not a big deal. Here is information about using calcium water from the Pomona website:
What are the ingredients in the monocalcium phosphate powder that comes with Pomona’s Pectin? The monocalcium phosphate powder that comes in its own packet when you purchase Pomona’s is a food-grade rock mineral source of calcium made up of two minerals, calcium and phosphorous. The food industry uses it as a yeast nutrient in baking, an acidulant in baking powder, and a mineral supplement. 
What is calcium water? Calcium water is a solution of some of the monocalcium phosphate powder that comes with Pomona’s Pectin and water. 
How do I make calcium water? Put 1/2 teaspoon white calcium powder and 1/2 cup water in a small, clear jar with a lid. Shake well before using. Store in the refrigerator between uses. Calcium water lasts a number of months. These same instructions are on the directions and recipe sheet that comes with Pomona’s Pectin. 
How long will calcium water keep? Calcium water should be stored in the refrigerator. It will last a number of months. When you take your jar out of the refrigerator, look at it before you shake it. You should see white powder settled at the bottom of the jar and clear water above that. If you see any other colors in the jar, discard the calcium water.
There is a bit of a learning curve involved in using Pomona Pectin. Personally, I found that the directions included in the Pomona box were very confusing for a first-timer.  It took us a while in our canning class to figure their directions out, and even our teachers were a little confused by some of their phrasing.  But eventually we figured it all out.

If you learned to make jam using high methoxyl pectins, it's confusing at first to switch to a different order of mixing things (you add the pectin to the sweetener first, not the fruit, or it will clump). You also have an extra step, adding the calcium water).  However, the advantages that Pomona offers outweighs the confusing directions and the extra steps.

For example, Pomona claims its pectin lasts indefinitely if stored properly. High methoxyl pectins don't keep well, and if you use last year's box, your jam may not set up properly. This means the storability of Pomona is a big advantage.

Another advantage is the "tweakability" factor. You can make double batches with Pomona, unlike with high methoxyl pectins, and that can be a huge time-saver. You can also add a certain amount of extra ingredients without messing up the pectin's action...just add a little extra lemon juice to keep the acidity factor high. And if your jam turns out too stiff or too runny, you can go back and tweak the jelling action.

All these things, plus the flexibility to use less sugar or different types of sweeteners, makes Pomona the first pectin choice of many experienced cooks.  It's definitely a brand to check out if you do much jamming, or if you prefer the taste of fruit over the taste of sugar.

Do keep in mind that if you are using less sugar, there will be less volume in the final product. Also, the lower the sugar, the softer the jam set tends to be, if that makes a difference to you.  But most people are more than happy to trade off these issues for the many advantages of Pomona.

Pomona Pectin can be hard to find in regular supermarkets, although most natural food stores carry it.  You can also order it directly from Amazon, or you can get it through Pomona's website.  Many food co-ops also carry it, and so do many farm-oriented stores.

Because of its many advantages, it's well worth the trouble to find and learn to use this less common type of pectin.

Do You Have to Use Pectin?

I'm sure some people are wondering whether you absolutely need to have pectin in order to make jam. Of course not; people made jam long before commercial pectin was around, But pectin does make your life a bit easier, which is why it's so popular.

Different fruits have differing amounts of pectin in them, so some don't need extra pectin to set up.  For example, apples, cranberries, currants, gooseberries, quinces, and citrus fruits have a lot of natural pectin and often don't need anything extra.

Most berries, peaches, and apricots, on the other hand, have very little natural pectin. But even low-pectin fruits can make a decent jam if you cook them long enough, add a lot of sugar, and add a little acid (like lemon juice).  The problem is you have to stir them in a hot steamy pot for quite a while, usually in the middle of the hot summer. Boiling for a long time also reduces the amount of nutrients in the fruit and the amount of jam produced.

Thus, many people elect to use pectins as a way to make jamming faster and cooler, and as a way to keep the jam more nutritious and less caloric. Others prefer to make jam without the shortcut of added pectin, feeling that the flavor is richer that way, even if the jam is a little runnier. It's all about your preferences.

You can find instructions for making jam without pectin here.  The trick is to use a certain amount of fruit that is a bit underripe (has more natural pectin), but not so much that the flavor is compromised.  Another option is to add apple juice instead of water when cooking, or to add other high-pectin fruits to the jam.

If you are going to make jam without pectin, it's important that you know how to recognize when it jells properly, as the amount of cooking time will depend on the ingredients used, the ripeness of the fruit, the water content of the fruit, your elevation, etc.

So the cooking skill-set needed for no-pectin jams is a little higher, but it can absolutely be done.

Can You Make Your Own Pectin?

Some people don't want to use commercial pectin, either because it is cheaper to make your own, or because they object to the processing that commercial pectin goes through.

Commercial pectin is made mostly from citrus peels or apple pomace (what's left over after juicing apples).  New pectins are being developed from sugar beets and even sunflowers, but citrus peels (and apple pomace to a lesser extent) are the most common sources for commercial pectin.

If I understand the process correctly, hot dilute acid is added, the results are separated and filtered, and alcohol is used to precipitate out the pectin.  The product is washed and dried and made into a powder.  This becomes the high methoxyl pectin we see in most supermarket brands.

High-methoxyl pectins (DE usually 60-75%%) are subjected to a de-esterification process using acid in order to hydrolise some of the ester groups and create low methoxyl pectins (DE around 20-40%). For the very low methoxyl pectins like Pomona, hydrolysis using ammonia converts some of the ester groups into amide groups, creating the amidated low methoxyl pectin that is needed for low/no sugar pectins.

All of this sounds complex and off-putting but is generally considered very safe. Still, if you object to all this processing or simply want a cheaper, more easily available pectin, you can make your own pectin at home from underripe apples or crabapples.  Directions can be found here, here, or here.

Remember that the result will be a high methoxyl pectin, but one that may result in a less firm gel than commercial pectins. You will need to use a lot of sugar (and some acid) in these recipes, need to have the skill to recognize when the proper jelling stage is reached, and be accepting of a slightly runnier product.  But making your own pectin is definitely do-able; it's what most of our great-grandmothers did.

Final Thoughts

Well, there you go, more than you ever wanted to know about pectin!

Turns out, pectin was way more interesting (and way more complex!) than I thought it was going to be when I started. What I thought was correct was often incorrect when I did a little more research. And I found that there are an awful lot of strong opinions out there about pectins.

However, what it boils down to (!) is that there are two main types of pectin. High methoxyl pectins needs lots of sugar and some acidity to jell, and low methoxyl pectins need calcium to jell and are thus great for jams with less sugar.

You can use commercial pectins, make your own, or create a jelling effect by cooking the fruits for a long time, but there is little consensus about the "best" type of pectin.  It all depends on what you want out of a pectin, what you are making, what fruit you are using, how sweet you like things, what sweetener you want to use, what gel consistency you want, and your opinions about how pectins are made.  The key is to experiment and find out what you prefer.

Some people prefer their jams super-sweet and cooked.  If this is you, high methoxyl pectins are probably your best choice. Sure-Jell in the yellow box, Certo or Ball liquid pectin, or Ball regular pectin are all brands that work well for full-sugar jams.

Some people want to use less sugar but don't want an ultra-low sugar jam.  Low methoxyl pectins like Sure-Jell in the pink box, Ball's Low or No Sugar Pectin, or Pomona Pectin are the best for this, and they all result in great-tasting jams that are still plenty sweet.

If you want very little sugar in your jam (or prefer a different type of sweetener), then an amidated low methoxyl pectin like Pomona Pectin is the way to go.

Most people I know who do a lot of jamming prefer Pomona, frankly, because it's so much more flexible than the other pectins. It's harder to find, but seems well worth the effort. However, any type of pectin works very well and results in a good product.

You can also make your jams without any added pectin. I would like to try this at some point so I know how to do it, but generally I prefer not to cook jams that long.  The flavor is too overcooked for my taste, and the jams too sweet.  But many purists prefer this style.

If you are feeling adventurous, make your own pectin!  I've never done this either, but I like the DIY aspect of it, and it's a good skill from an emergency preparedness point of view. I will try this at some point so I know how to do it, but it probably won't be my main kind of jamming unless it needs to be.

Personally, I prefer the low methoxyl pectins.  I've had great luck with Sure-Jell in the pink box; it was very easy for a beginner to use and the results were really tasty.  I'm experimenting now with using Pomona Pectin in order to reduce sugar content even more in my jams.  I really like the flexibility it offers over other pectins, so I think I'll probably use it more as I do more canning.

If you are a beginner and feeling totally intimidated about the whole process, I suggest you start with the pink box Sure-Jell Strawberry Freezer Jam recipe so you have an easy first experience with jamming and don't have the added intimidation of water-bath canning. And the flavor of this jam is soooo good, it makes great Christmas gifts...if you can bear to give it away!

Then when you have had your first successes (and have gotten addicted to homemade jam!), try some of the canning recipes that use a boiling water bath.  Truly, it's not that hard, and you're not going to poison your family.  Plus the results are delicious and don't have to be frozen!

As a fellow beginner, I would also remind you that you don't have to preserve everything under the sun. People often feel intimidated by the Canning Queens out there and can't envision spending that much time and effort. Just because some people spend tons of time on canning doesn't mean you have to. You can preserve food just as much or as little as you prefer.  

Start small and see how it feels, then if you like it, expand into different fruits, techniques, and pectins as your time allows.  Take a class and learn new techniques if you prefer to learn by watching and doing.  Experiment with new recipes. Allow yourself to make mistakes and remember that you don't have to be an expert overnight.

I promise, you don't have to be Betty Crocker or Susie Homemaker to learn how to can. I'm about as far from a Domestic Goddess as you can get, but I've found canning quite rewarding, not to mention delicious and nutritious. Give it a try!

 *What are your favorite jam recipes?  Tell us about them and share a link to the recipe!

**Pectin Trivia: High methoxyl pectin is also being used as a treatment for some cases of high LDL cholesterol, as it inhibits the absorption of cholesterol from foods.  It's a common ingredient in anti-diarrheal meds as well.  There is also some evidence that modified citrus pectin (MCP) may reduce the risk of tumor metastasis, especially in prostate cancer and perhaps breast cancer and melanoma.  However, all this is preliminary and far from well-proven; always consult your care provider before trying anything new.  I just thought it was interesting that pectin might have some medicinal benefits too.

***Update October 2018: I now have added a guide to Remaking Runny Jams. If you have a batch of jam or jelly that does not set up and gel, try some of the techniques in this post. 

Further Canning and Pectin Information

General Canning Information
General Pectin Information
Pectin Info for Science Geeks
Info on Making Low-Sugar Jams

Thursday, August 30, 2012

Getting Started with Canning

World War I Canning Poster,
Image from Wikimedia Commons
We are talking about gardening and canning the goodness from our gardens (or the farmer's market).  Today we address reasons why some people are reluctant to start learning about canning, and how they can get started if they decide to try it.

Canning Safety

A few years ago, I was scared to death to try canning, just like many other people are. I was afraid I might inadvertently kill my family.  But canning's gotten a bad rap over the years, and the science behind canning safety has come a long way.  If you follow the directions, you are unlikely to make your family ill.  The key is to know a few basic principles and to follow recipes carefully, especially in a few key foods.

Safety-wise, what I didn't know then was that high-acid foods, like the jams and jellies most people start with, aren't really that dangerous.  You're not going to get botulism from jams of high-acid fruits.  You might get yeast or mold, but you'll see any spoilage, unlike with botulism, which is odorless and colorless.

So with jams, you'll know if your canned food has gone bad and that you should throw it out. (Throw it all out, because mold extends down into foods beyond what you can see, and can produce mycotoxins which might make you sick).

Botulism, the real thing to worry about, mostly occurs with tomatoes or low-acid products like canned vegetables and meat.  The problem is that if your salsa, canned asparagus, or canned beef has gotten botulism, you might not know it and botulism is dangerous stuff.  Although it's not common, some cases of botulism do occur each year and can be life-threatening.

Jams and preserves are much safer, and that's why they are best for beginners to start with. They are much more forgiving of errors, and spoilage (if any even occurs) will be obvious.

Make no mistake; the other foods can be done safely too, but you need to learn how to do it right (and what prevents botulism). If you want to do tomatoes and/or low-acid foods, get yourself a pressure canner, take a class so you know how to do it safely, and follow tested recipes exactly.

Canning Resources

The other reason people avoid canning is because they think it's really hard. I promise you, canning is not that hard.  It just takes a little practice.

I do suggest canning classes if you can manage it, even just for jams. It's really great to learn the science behind canning so you know proper safety practices, so you practice canning skills in a group where you can learn from each other, and so you have an expert to answer common questions. It's also a great way to find new and unusual recipes.

I first learned how to can from a friend of the family, but she follows old outdated practices (no boiling water bath). Many of the jars of jam we processed went moldy.  While this wouldn't have killed us, it was an awful waste of food.  So I recommend taking a class from trained teachers rather than learning it from a friend or family member, unless you know that person has been properly trained first.

Google your state's name and "extension classes" and many states will have a selection of various canning classes available through the agriculture department of your state university.  They are often offered as "outreach" classes in various communities around the state, so you may not have to travel too far.  Many larger cities also now offer canning classes through local cooking schools, gardening societies, urban homesteading organizations, and other groups.  So there are lots of choices available.  And many extension services have a "preserving" hotline in the summer that you can call if you have questions.

I learned how to can from books (after the disaster with my friend). This summer I took extension classes with my daughter to make sure she knows how to can before she graduates high school, and to brush up on my own skills. The classes were great because I learned some things I didn't know. It was very much worth the time and effort and they really didn't take a lot of time.

Being a geek, I especially liked the dollops of science in the class explaining why things worked and why the safety rules were there. I also really liked the hands-on portion of the classes where we put the lessons to work (especially because they did the prep and the clean-up!). And we got to take home several jars of our homemade jelly/jam, pie filling, and salsa. YUM.

However, if there are no classes in your area or you want to get started on your own, the best place to start is Ball's home preserving books. Ball's Blue Book Guide to Preserving is the classic of the field.  All the recipes are carefully tested and there are instructions on how to can.  I also really like Ball's Complete Book of Home Preserving.  Everyone who cans should own these books as references.

If you are the type of person who learns best by watching instead of reading, you can also find many videos on YouTube etc., demonstrating how to do all this.  Some of the best are from the Ball website, http://freshpreserving.com/getting-started.aspx

Personally, my favorite canning book is "Put 'Em Up" by Sherri Brooks Vinton. There are lots of good canning books out there to choose from, but hers has some of the clearest directions and illustrations of the basic canning process I've found, and she has her recipes organized by type of fruit, which makes it easier to use than most books. She also has info on pickling, freezing, and drying, so it's useful on several fronts.

Another good book (and website) is foodinjars.com.  If you don't have many people in your house, she has recipes that are suitable for small-batch canning.  And her website has tons of ideas and info.  I especially like her "it's okay to make mistakes" philosophy.

Generally speaking, you do want to use recipes that have been tested. Again, jams are more forgiving than low-acid foods so there's more room for creativity, but for tomato and low-acid foods you want to be sure to use recipes that have been thoroughly tested for safety, and to follow those recipes exactly.

The best resource for thoroughly tested recipes is Ball's website, freshpreserving.com.  LOTS of good recipes there. Or there's Georgia's National Center for Home Food Preservation, http://nchfp.uga.edu/.  They have a good book, "So Easy to Preserve," available by mail order, plus lots of online resources too.

Summary

Canning is actually a lot easier than it looks at first.  Take it from someone who was scared to death to try it not all that long ago!

Starting with high-acid fruits is the way to go.  It's easy, forgiving, and you won't kill your family. And the fresh taste of summer in the middle of winter will motivate you to come back to do more each year!

If time is an issue for you like it is for many of us, remember that you don't have to preserve everything in sight.  It's not all-or-nothing. Start with something small, like an easy canned jam. You don't need to be canning all summer long unless you want to. Just do what you have time for. It still counts, even if you don't have the giant shelves of canned goods that some people do. It's okay to start slow and easy, and it's okay to just do what you have time for.

If money is an issue, look on Craigslist or Goodwill for used canning equipment. Or go look in the stores right now; lots of canning equipment is on clearance right now because they want to make room for fall stuff.  You can get some great deals that way. But really, you don't need a special pot for canning; just one big enough to handle covering the jars with an inch or two to spare.  An old stock pot is just as good.  Do get the special jar-lifting tongs, the canning rack, the lid-lifter, a good funnel, and such; that will make your life easier.  But that's all you really need if you already own a good stock pot. (Or if you are doing small-batch canning in small jars, you may not even need a stock pot.)

If you still feel uneasy about canning, try making freezer jam instead. (That's what I did.) The Sure-Jell Strawberry Freezer Jam (low-sugar, pink box) is to die for!  Or you can make regular jams and then just freeze them instead of canning.  The trick is to just get your foot in the door.  Eventually you'll get up enough guts to try full-blown canning.

Again, remember that if you want to can vegetables or meats, they have to be done in a pressure canner because they are low-acid foods. (We missed that class this year, so that's a project for next year.) Tomatoes can be done in boiling water bath canners, but only by adding extra acidity with lemon juice or vinegar, and with careful attention to the proportion of acid to non-acid ingredients. In my opinion, tomatoes and low-acid canning are two types of canning where a class is definitely a must.

But for jams, jellies, and preserves, canning is actually pretty easy.  It's mostly a matter of being organized, having the right equipment, getting good fruit, having a reliable resource for questions, and having some good recipes.  Then just take the plunge!  You'll be glad you did.

*What did you can this summer, or what are you hoping to can?  If I have time in the next few weeks, I think I might try Ginger Peach Jam, plus my old stand-bys of applesauce and plum chutney.  That's probably all I'll have time for, besides the Roasted Goodness Spaghetti Sauce (for the freezer) I'm famous for.  How about you?